Tuesday, December 25, 2012

Rudder Pedals Part 4

I trust that everyone had a good Christmas.  It is a great time to gather with family and reflect on how we are all truely blessed.  It is not, however, a good time for progress on an airplane build even with the extra time off work.  One highlight of my holiday was that my 91 year old grandmother came to visit and I got to show her my project.  Now I know most grandmothers wouldn't have much interest in such a thing but mine listened intently as I gave a rough overview and then she asked a whole bunch of questions and made some observations showing that she doesn't miss a thing.  Her mind is as sharp as a tack even though her hearing isn't.  After dinner, I heard her talking with my wife's grandmother and she asked her "Have you seen the airplane that Justin is building?  It really is quite the thing."  Ok, so I'm bragging a little bit, I know.  It feels good that after all these years I can do something that makes my grandma proud.

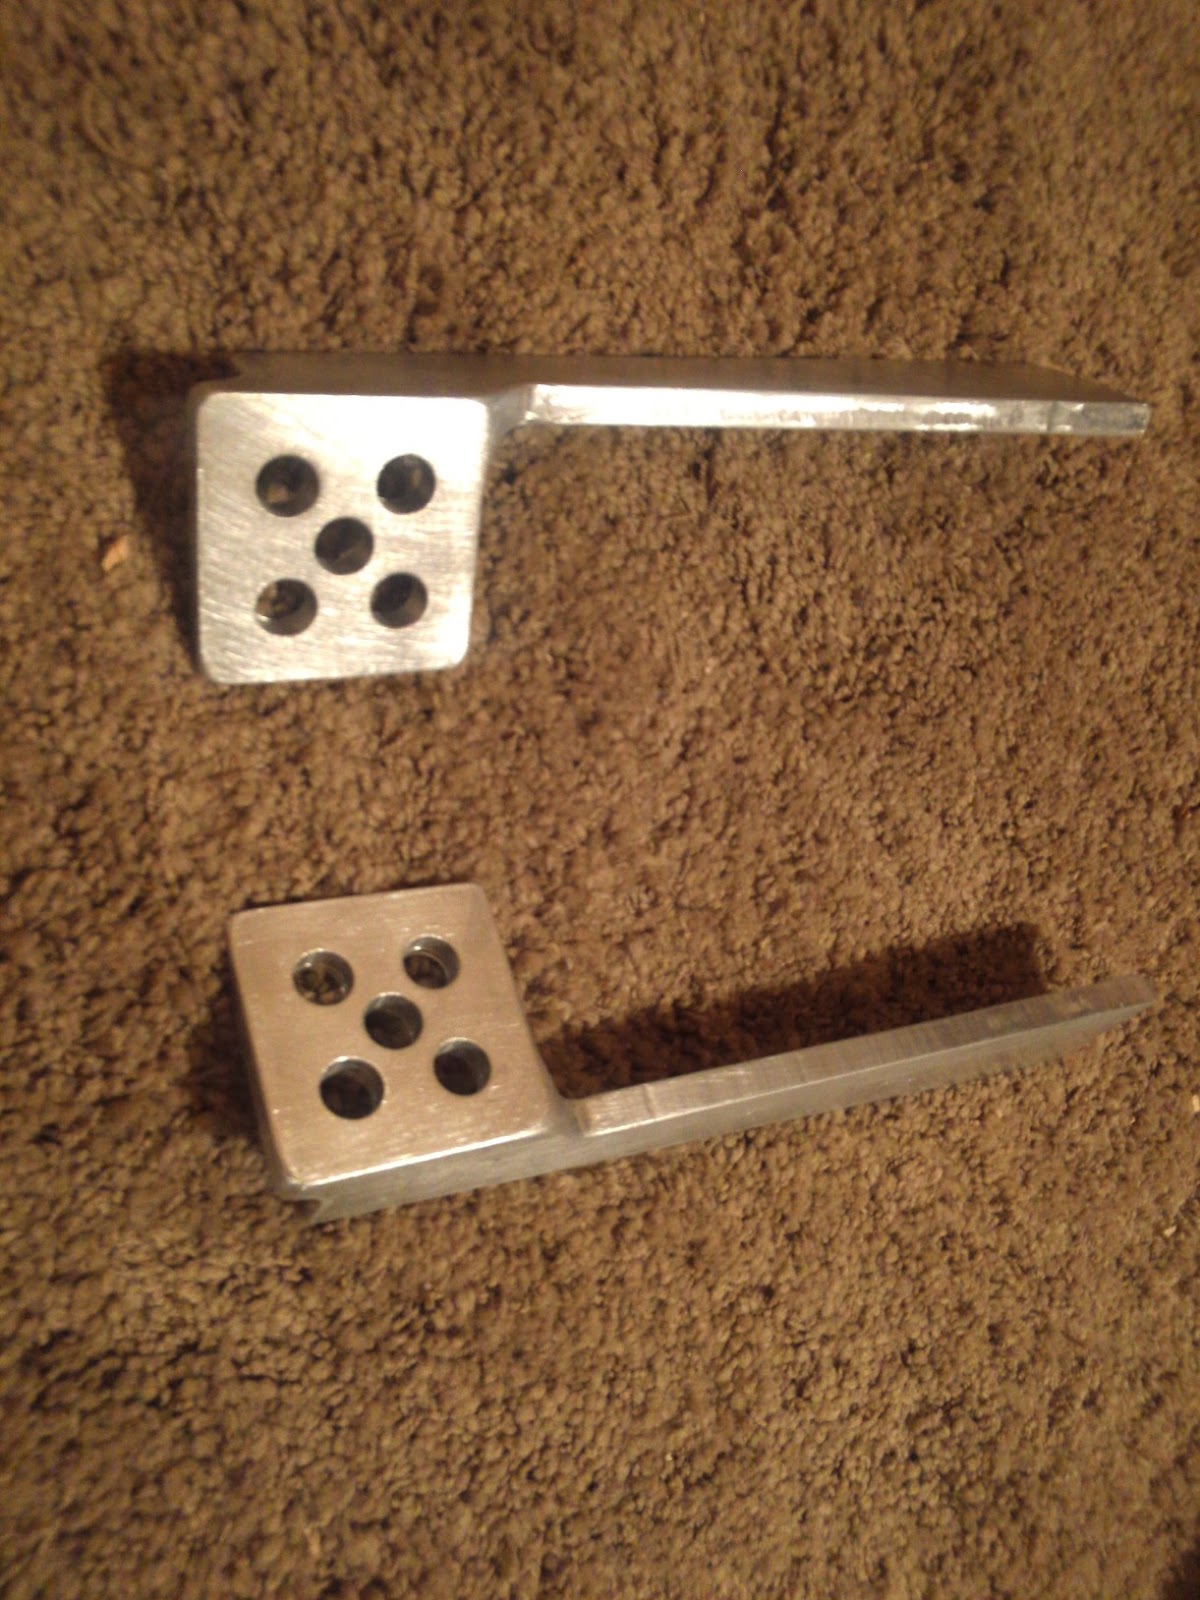
Saturday night I laid out the holes for the rudder cable mounts and the lightening holes on the side of the rudder pedals.  Tonight I changed my mind and cut big slots instead of the series of holes.  It was probably a dumb decision this late in the game as they didn't machine out as nicely as if I had done them earlier in the process.

I am thinking about mounting the fuel tank at the top of the fuselage just ahead of the pilot.  I would love to hear anyone's opinions on this or suggestions on how to accomplish the support structure.

Number of hours:  3.3
Total hours:  140.3

Wednesday, December 19, 2012

Rudder Pedals Part 3

I got home late from work so I didn't get a lot done tonight.  I cut and glued the last gusset on the right cockpit longeron tonight then I noticed that the side longerons were starting to cusp a little bit so I cut two spacers and put them between the upper seat back cross member and F2.  Then I laid out and drilled 5 lightening holes in the front of each rudder pedal.

Number of hours:  1.3
Total hours:  139.7

Tuesday, December 18, 2012

Rudder Pedals Part 2

I cut and glued two more gussets for the cockpit longerons tonight, one on the left and one on the right.  Then I roughed out the left rudder pedal with my jigsaw and finished milling it to match the right rudder pedal.  I finished my night by filing and sanding the edges smooth on both pedals.  I still have my laundry list of operations to complete on both pedals, but they are coming along nicely.  It was nice to end the night with a matching set.

Number of hours:  2.7
Total hours:  138.4

Monday, December 17, 2012

Rudder Pedals Part 1

The left side cockpit longeron broke apart the other day so I glued it back together tonight.  I built one gusset for the longeron and will be building more tomorrow to help transfer some of the load over a larger area.

I had a couple of hours stuck in a plane last week while traveling from MSP to DEN and back in the same day, so I took advantage of that time and finalized my rudder pedal plans.  I started machining the pedals tonight and have the right pedal almost done (it still needs lightning holes, bearing hole, cable mount, and rounded end).  The left pedal is roughed out but still has quite a bit of work left to go.

I updated the "Plans Questions" and "Modifications" pages today.  One special note, only about 3 gallons of fuel will fit under the seat so the fuel tank issue is still unresolved.

Number of hours:  3.8
Total hours:  135.7

Monday, December 10, 2012

Left Cockpit Longeron

I finally understand why a lot of homebuilt aircraft projects are never completed, life gets in the way!  I fully expected that deer hunting would interfere with my build but what a couple of weeks!  The night before we were supposed to leave for hunting last week my father-in-law slipped on some ice, breaking his leg is 3 places which required reconstructive surgery and a 4 day stay in the hospital meaning that I have been hunting solo and taking care of chores up North for the past two weekends.  I ended up coming home on Saturday night both weekends due to severe weather advisories on the following Sunday.   I figured that I would be able to get some build time in this Sunday but instead I spent the largess of my day arranging for a new motor to be installed in my truck because it spun a connecting rod bearing on the trip home from the cabin.  This is not a wonderful thing to happen, especially around Christmastime when things get a little tight for us financially.   The remainder of my Sunday was spent clearing the 2 feet of snow out of the driveway.  I hope that nobody sees this as complaining or a bunch of excuses.  I love winter and snow, it is a chance for us to justify our 4 wheel drive vehicles, use the hot tub, snowmobile, hunt, and it's just plain beautiful.   Life is an adventure, anyone who knows my background would agree that I have had my share of challenges and obstacles but I always try to keep a positive attitude and, most importantly,  F.R.O.G.

Back to the topic of this blog!  With baited breath I pulled the clamps off of the right side cockpit longeron and...nothing broke loose; and there was much rejoicing.  Tonight I cut the braces for the left side cockpit longeron and glued it all in place.

I was contacted by a fellow Onyx builder stateside recently.  In my contacts with various builders, researchers, and fans I keep adding to my cache of Onyx information.  He sent me the picture below of a wood Onyx with strut braced wings.  I don't know if this is the original wingspan or the longer wingspan version like my project.  The other thing that sticks in my mind? is that the fiberglass version of the Onyx has the fuel tank under the seat.  I am intrigued by the possibilities that this tank location could afford so stay tuned for another possible addition to the modifications page.

Number of hours:  0.7
Total hours:  131.9

Wednesday, December 5, 2012

Right Cockpit Longeron

I came home from work today to find the pieces of my progress yesterday broken and on the floor.  Before I left this morning, I had put the longerons in the bent position and this, coupled with the glue not being fully cured (24 - 48 hours duh), was too much stress on the glue joints.  So tonight I glued the parts back in place along with the braces for the right cockpit longeron and I won't touch it for 48 hours this time!

Number of hours:  0.8
Total hours:  131.2

Tuesday, December 4, 2012

Cockpit Gusset Blocks

I machined the cockpit gusset blocks and used a belt sander to remove the stand offs that I left during the machining process at work today.  At the end of the day I called our EAA chapter's tech counselor and set up an appointment for next Tuesday night for him to come out and look over my work.

When I got home, I glued the two blocks in place and cut the old cockpit front edge to allow the cockpit longerons to pass through to the new front edge cross member.  My order of 4130 from Aircraft Spruce arrived today so I spent some time checking the items to the packing list.  I then realized that I was missing the control rods for the canard because I had forgotten to order them.  I will have to order the 2 pieces of 5/8" diameter X 0.04" wall X 48" long tube from Aircraft Spruce when I place my next order.  Probably when I order my hinge material.

As I was writing this post, my doctor called and said that I can pick up the results of my psych testing on Thursday so I will be able to send them off to the FAA finally!

Number of hours:  1.2
Total hours:  130.4

Monday, December 3, 2012

Cockpit Longerons

My 4 point harness came via UPS today.  It is much nicer than I expected.  I cut and glued 2 gusset blocks for the new forward cockpit cross member tonight then glued the 2 upper seat back supports in place along with another 2 gusset blocks behind the upper support.  Then I glued the rear edges of the 2 cockpit longerons to the upper fuselage longerons at the point where they meet the seat back.  I finished the night by laying out the two gusset blocks that make up the rounded rear corners of the cockpit opening.  Hopefully I can get them machined at work tomorrow.

Number of hours:  1.6
Total hours:  129.2

Sunday, December 2, 2012

Cockpit Mods

Ok, back to work.  I started the cockpit modifications tonight by cutting and gluing a cross member at the new forward edge of the cockpit.  It is 140mm back from the next forward cross member.  Then I cut and glued 3 more cross members to support the seat bottom plywood and seat back plywood.  I will glue the 2 upper seat back supports in place tomorrow night.

Number of hours:  1.0
Total hours:  127.6

Monday, November 26, 2012

Unseen Progress

I recalculated my 4130 needs today to fit Aircraft Spruce's product offering because I could save $150 over the cost of McMaster Carr plus I will end up with less scrap.  I also started to redesign the cockpit opening.  The current opening is 27" and I cannot easily egress so I am changing it to MiniMax dimensions of 31-3/4".  I ordered a 4 point harness on eBay.  I am holding off sheeting the fuselage until I can get the cockpit and controls figured out.

I am going to make my own design pedals that hang from above so that design is in the works too.

I won't have a ton of progress for the next couple of weeks due to the opening of Muzzle Loader deer season.

Number of hours:  2.0
Total hours:  126.6

Thursday, November 22, 2012

Motor Mount Shear Web

Happy Thanksgiving!

I cut and glued in place the shear web that goes on the bottom of the motor mount reinforcement block then I glued the cross member to the front of F2 (hopefully for the last time).

Number of hours:  0.8
Total hours:  124.6

Wednesday, November 21, 2012

Motor Mount Reinforcement Block

I machined a test panel for the seat bottom today at work.  It looks like I will need to move the cross brace that sits under the seat further forward to help support the rear edge of the seat bottom.  I tried sitting in the seat and I think that I will need to move the forward edge of the cockpit forward a few inches as I was unable to fit my knees inside without putting a lot of weight on the fuselage sides.  I will test this further once the sides and bottom are fully sheeted.

I cut and glued the motor mount reinforcement block into the rear of the fuselage tonight.  Then I started to fit the side sheeting on the left rear side of the fuselage.

Number of hours:  3.6
Total hours:  123.8

Tuesday, November 20, 2012

F3 In Place

I removed the staples from the right side main gear fitting last night.  Tonight I glued F3 in place and scraped some epoxy drips here and there.

Number of hours:  1.4
Total hours:  120.2

Sunday, November 18, 2012

Main Gear Shear Webs

I cut and glued the shear webs onto the main gear supports today.  I also finished touching up the sixth notch on the fuselage floor.

Number of hours:  2.7
Total hours:  118.8

Saturday, November 17, 2012

Moving Forward

I started my day by removing the cross brace that I referred to in yesterday's post.  Then I glued the vertical support back in place and the two main landing gear vertical supports.  I worked on notching out the floor and cut all 6 six notches but only got 5 completely cleaned up.  I finished the night by cutting and gluing the struts and corner braces that hold the front of the fuselage together.

Number of hours:  3.4
Total hours:  116.1

Friday, November 16, 2012

F1 in Place

I cut the notches and bevels into F1 on a bandsaw at work today.  I glued F1 in place tonight and glued the right side strut to the right side main landing gear support.  I glued the final strut on the top of the fuselage at the rear just ahead of F3.  I cut the two 12mm X 12mm X 100mm main landing gear upright braces and then I traced the floor onto a piece of 6mm plywood.  I cut the profile of the floor and started cutting one notch in it but then I ran out of time for tonight.  I noticed tonight that the left side of the upper longeron was 1/8" lower than the right at F2 due to a stupid mistake.  I will work on fixing that tomorrow, among other things.

Maybe I'll start to sheet things by the end of next week!

Number of hours:  2.8
Total hours:  112.7


Thursday, November 15, 2012

Front Landing Gear Reinforcements

I pulled the staples out of F1 and then I cut the 2 - 60mm X 400mm X 1.5mm front landing gear reinforcement strips and glued one to the front and back faces of F1.  Next, I glued the right side main landing gear reinforcement to the right side.  I finished the night by gluing the front legs back onto my son's moose toy that he broke.

Number of hours:  1.8
Total hours:  109.9


Wednesday, November 14, 2012

F1 Buttoned Up

I added some more epoxy to the left hand main gear brace to fill a couple little gaps this evening.   I mixed up a large batch of epoxy and glued the front sheeting on F1, sealing it shut.  I will add a 60mm X 400mm X 1.5mm strip of ply to the front and back of F1 as a next step.

Number of hours:  1.2
Total hours:  108.1


Tuesday, November 13, 2012

F1 Second Coat of Varnish

I put the second coat on the interior pieces of F1 tonight.  I cut the curves into the two main landing gear braces at work today with a bandsaw and glued the left brace in place tonight.  I hope to glue the right brace in place tomorrow.

Number of hours:  0.7
Total hours:  106.9

Monday, November 12, 2012

Varnishing F1

I put the first coat of varnish on the interior parts of F1 tonight after removing all of the staples from it.  I switched to 1/4" long staples and this improved the removal process greatly.   I took the two landing gear braces out into the cold cold garage tonight and used a 3/16" diameter end mill to cut the 35mm X 142mm slots for the main landing gear.

Number of hours:  1.2
Total hours:  106.2


Sunday, November 11, 2012

F1 Aft Sheeting

I spent some time today scraping dried epoxy off a few areas and trimming F3 for a better fit.  I cut the plywood sheeting for the fore and aft faces of F1 then traced the outlines onto both sides of each face.  I finished the night by gluing the aft sheet to the aft face of F1.  It took a ton of glue,  I forgot how much plywood soaks up adhesive.

Number of hours:  1.9
Total hours:  105.0

Saturday, November 10, 2012

Variety is the Spice of Life

I started this morning cutting more cross members and gluing them in place.  The next project was shaping the two sides where they meet at the back and then gluing the two sides together at the tail.  I moved on to planing the new wood that I received from Aircraft Spruce.  I cut the two side reinforcements to length that will hold the landing gear just ahead of F2 and then laid out the curved cut on the bottoms and the slots for the landing gear.  Hopefully I will get to cut the slots and curves at work on Monday.  The last thing that I worked on for the day was cutting the remaining 3 pieces of spruce for F1 and gluing them in place.  I haven't posted pictures for a while so here are some progress shots from today.

Number of hours:  3.3
Total hours:  103.1


Friday, November 9, 2012

Seat Front Brace

I cut, shaped, and glued in the seat front brace tonight.  I also unpacked and checked my Aircraft Spruce shipment.

Number of hours:  0.4
Total hours:  99.8

Wednesday, November 7, 2012

Accumulated Tolerances

Well I tracked through all of my dimensions tonight and found that F2 is about 6 mm further back than it should be, although at least 2 of that will disappear when the front of the fuselage is curved in.  It's a case of 1/4mm here 1/2mm there adding up to me pulling my hair out.  I don't believe that this will cause any issues.  I got F2 glued in place tonight, I plan on adding some flox fillets when it is cured.

Number of hours:  1.2
Total hours:  99.4

Tuesday, November 6, 2012

Forward Progress

I spent a half hour fixing what I broke yesterday.  I also machined out a test seat back to check fitment, only minor changes are required to the seat back.  The next shipment of wood is scheduled to arrive on Thursday!

Number of hours:  0.7
Total hours:  98.2

Monday, November 5, 2012

Babies and Bath Water

I cut the slopes into F2 and F3 then I fitted the notches on the bandsaw at work today.  When I got home I dry fit F2 then started to glue F2 in place using epoxy and flox.  I spent the next 3 chasing my tail trying to get things square and in their proper positions.   I did some bad math that made me think that I was off by 7mm.  This led to me to move F2 back and re-align thingsbagain.  With all the measurements, tweeking, and repositioning I ended up breaking some cross members so I decided to take F2 back out and scraped off as much flox as possible.  At the end of the night I am further behind than when I started, arrrrgggghhh.  Oh well, I will lay things out again tomorrow and triple check my math before mixing glue.

Number of hours:  3.4
Total hours:  97.5

Sunday, November 4, 2012

Control Cable Route

The plans don't show how the control cables are supposed to magically route from the rudder pedals and control stick pulleys back to the wing pulleys.  The seat back is shown in the plans as solid so I laid out the approximate locations that the cables would intersect the seat back and my plan is to put a 3/4" slot in that location starting 190mm and ending 350mm from the bottom of the seat back.  I am not sure how they will route through F2 yet but that is a problem for another day.  I am also putting a 95mm X 65mm chamfer on the upper 2 corners of the seat back to allow clearance for the radius blocks that are on the top surface of the cockpit and I can run wires or fuel lines through the openings as needed.

I decided to rush things a little bit and try to sit in the cockpit sans seat.  I ended up breaking one of the bottom struts off so I had to glue it back in.  While I was at it I removed a crooked strut and glued it back in place nice and square.

Number of hours:  1.6
Total hours:  94.1


Saturday, November 3, 2012

Flipped and Trimming

I flipped the fuselage this afternoon and started to fit F2 and F3.  It looks like it is flying even when it is sitting still.  I know, I should be out deer hunting but I had to pass and take care of the kids since my wife is still recovering from her surgery.

Number of hours:  1.4
Total hours:  92.5